
So now we’re ready to get to work!
I’ve opened power point and by golly there is a lot to choose from when it comes to “canned” layouts. I don’t use any of them! Not that they are bad mind you, I’m just a control freak who has to do everything myself. Therefore for the purposes of this post, I’ll be opening a blank presentation.
Once you’ve opened your blank presentation, as the song from Meatloaf says – “STOP RIGHT THERE!”
I’d like to direct your attention to the “View” tab. Click on it and you’ll open up the View menu and that’s where you want to be for this discussion. Refer to the image if you are having difficulty locating the tab.
 When you have it open click on the slide master, I have it highlighted and the tool tip is turned on. It gives you a better explanation of what the slide master is all about.
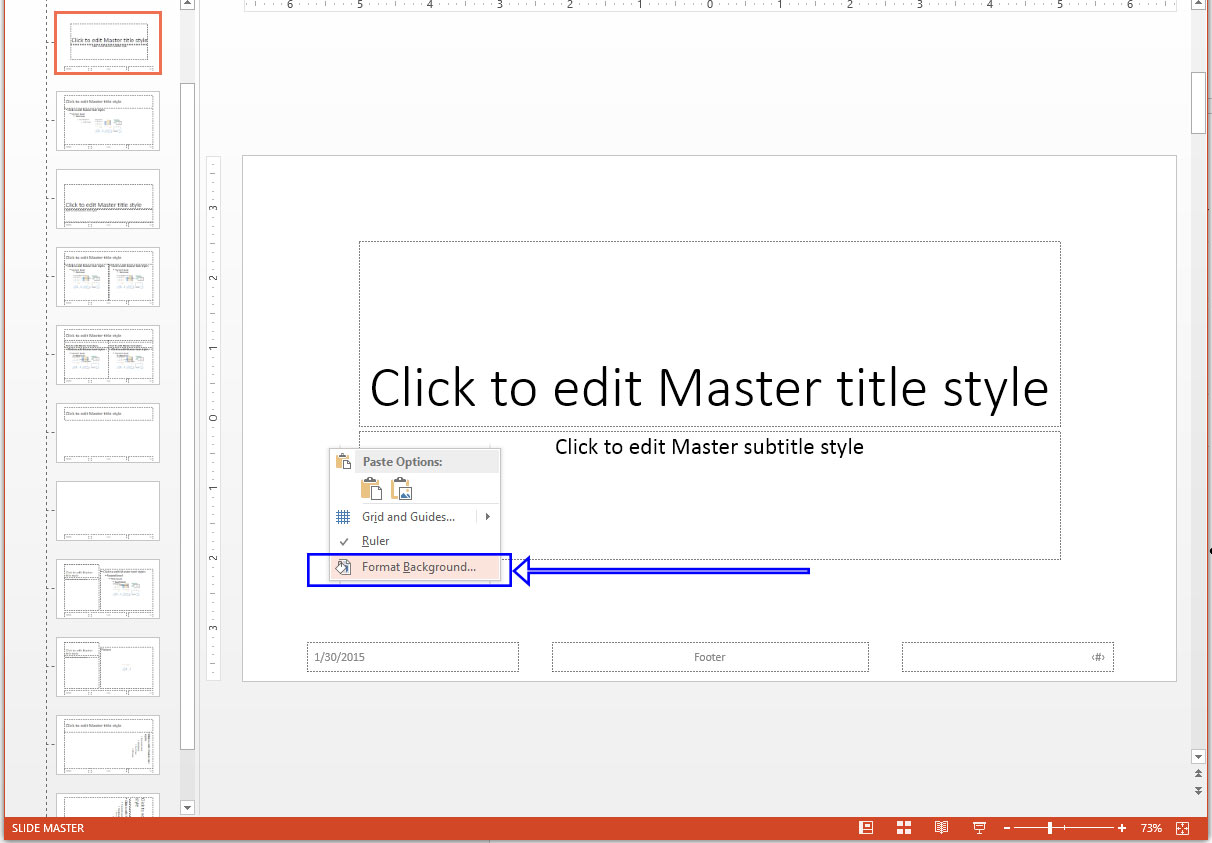
 You’ll see a screen that looks like the one below, what I’d like you to do is right click anywhere in the slide area to bring up the context menu and from there select “Format Background.”
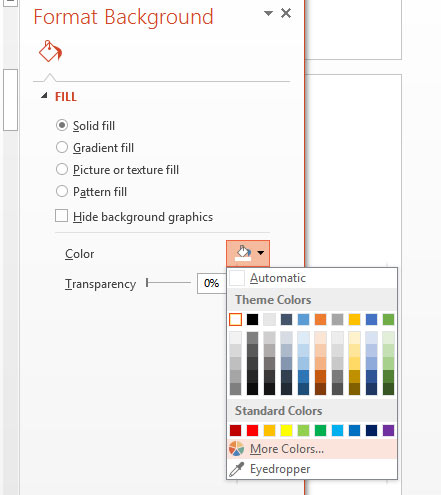
A window will open on the right which is where we will be working today

Ive selected the color option, and from there, we’ll select more colors, you can see it just below the standard color squares
If you have ever used any of the various versions of PowerPoint, you have probably seen and most likely used this window before, for this exercise, I will be using a custom color and you can get to the custom color dialog by clicking on the “Custom” tag. I used Red-Green-Blue values of 0-52-102 as shown in the graphic because this is one I use quite frequently in presentations I prepare where I work.

Lastly click “OK.”
Notice that only one of you master slides have the background we just made. You can ally different background to each of your master layout slides by selecting the layout you want on the left and then following the steps I just showed you to set the background.
I STRONGLY recommend you don’t do this or do it sparingly however, you don’t want the slide layout over shadow the message you are trying to convey with you presentation. So we will click the “apply to all button to apply our background to all of our possible layouts.
 I took the liberty of jumping ahead a bit and turned my font white so you can see them, I show you how to do that in my next post, but for now here is the result

Click on “Close Master view”

Here is what your screen should look like:

The beauty of using this method is that all of your subsequent slides will have this background. It must be noted that I used Office 2013 to set up this demo. If you would like to know how to set the background in earlier versions of PowerPoint, leave me a comment and I’ll get right back to you!
Also, let me know whether or not you found following my post easy to follow. I have found following video tutorials somewhat troublesome at times because, the person giving the tutorial knows what they are doing and they move right along while I’m trying to keep up! I hope you found this format helpful.
